Followers

Showing posts with label American Independence. Show all posts

Saturday, April 30, 2022

The Granite General

The American War for Independence had many fierce fighters, but few senior officers were tougher than the Granite State's own John Stark. Stark was an American made from the same rough cloth as Anthony Wayne and Daniel Morgan, yet also possessed the sharp tactical mind of Benedict Arnold and the strategic vision of Nathanael Greene. Still, John Stark is little known outside his home state of New Hampshire, and even there, he's mostly remembered for his statue in Manchester. 


John Stark statue in Manchester


A Rugged American

John Stark, the son of Scottish immigrants, was born on August 28, 1728, in Londonderry, New Hampshire. As a boy, he moved with his family to Derryfield, now called Manchester. It was Stark's home whenever he was not out hunting or fighting.


Trapping in Deep Forests


In the mid-18th century, much of New Hampshire was a frontier of rugged mountains, dense forests, plenty of game—and native tribes. Stark grew up in this wild wilderness, spending much of his time in the forests hunting, trapping, and honing the skills of a backwoodsman. And he was no stranger to the region's violence. These experiences helped shape his rugged individualism and self-confidence, which would later serve him and the nation.


The Hunter or the Hunted?


Frontier Hostage 

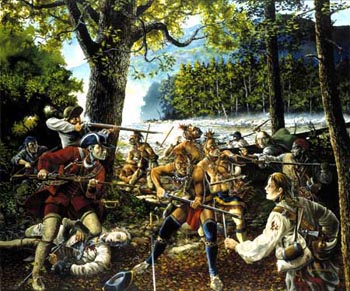
On April 28, 1752, a group of Abenaki warriors captured young Stark while he was out hunting game and trapping fur along the Baker River. One of their members, David Stinson, was killed. Luckily, Stark managed to warn his brother William, who escaped in a canoe. However, the warriors took John and his companion, Amos Eastman, to Canada. 


Abenaki Hostages


His time as a prisoner toughened him. He and fellow captive Amos were ordered to "run the gauntlet" of braves wielding clubs during their captivity. Few get through the ordeal of the gauntlet without suffering a savage beating, and some succumbed. Stark was not intimidated. Showing the grit he would later be known for, the young man jumped on the first warrior, seized his club, and attacked the astonished braves. 


Running the Gauntlet


His bravery and strength impressed the Abenakis, and the chief took Stark as a member of their tribe, where he spent the winter. Later, the colony sent representatives to ransom the two captives, with Stark alone costing the treasury 103 Spanish dollars. Stark returned home but now had a strong bond with the clan he had lived with.

Let's Go Rangers!

In 1755, the simmering conflict on the western frontier erupted in North America. The French and Indian War (Seven Years' War in Europe) pulled Stark and his brother William into the fighting. To the British, the war was about building an empire in North America and around the world. For the colonists, it was a fight for survival against relentless enemies.


John william joined Major Robert Rogers's company of rangers. Rogers's Rangers became the most famous frontier fighting force of their time and the inspiration for books and movies. Tough men, accustomed to the hardships of the frontier, the rangers knew and used every trick to venture deep into the forests and cause trouble for the French and their Native American allies. 


Rogers's Rangers


Young John Stark distinguished himself in the battles at Lake George, Bloody Pond, Halfway Creek, Fort William Henry, the Battle of Snowshoes, as well as the 1758 Battle of Fort Carillon and the 1759 campaign during which Fort Carillon was abandoned. 


Crisis of Conscience

In a strange twist, the gritty and hardened Stark faced a unique crisis of conscience in 1759 when British General Jeffery Amherst ordered the rangers to march from Lake George (NY) to the village of St. Francis in Quebec. The town was founded by Jesuit missionaries for converted Indians and was the home of the Abenaki, who had become his foster parents during captivity. Although now a captain and serving as Roger's second in command, the rugged young frontiersman refused to take part in the attack. He soon left the rangers and returned to New Hampshire to spend time with his wife of one year, Molly Page.


Rangers move against St. Francis


Home

When the war ended in 1763, Captain Stark retired and returned home to Derryfield to join Molly and raise a family of eleven children. Unlike most of his peers, young John Stark refused to participate in local politics and declined to attend political meetings, even as the American Revolution approached. However, he overcame his natural aversion to authority when he sensed his country was in peril. In 1774, he joined the local Committee of Safety, which organized the colonies' self-defense and served as the foundation for resistance against British authority. Local safety committees prepared the colonies' towns and counties for political action, self-defense, and war.


Committee Meeting


Call to Arms

When word of Lexington and Concord reached him, Stark left his farm and sawmill with musket in hand, heading for Boston, where New England was rallying to face the British. Appointed a colonel, Stark was put in charge of the regiment he recruited—tough New Hampshire men. He quickly got into action on 27 May 1775, leading a raid on a British foraging party on Boston harbor's Noodles Island. 


Raiding in the Harbor

Mystic Beach

But his real debut came at a place called Bunker (Breed's) Hill on June 17. Stark's regiment was among the first to face the heavy British naval fire to seize the vital ground below the crest. Stark now commanded his own unit plus the Second New Hampshire. On site, Colonel Prescott, the commander, told Stark to decide where he wanted his regiments to defend. 

The former ranger quickly saw that the north flank was the weak spot of the American position. There, he placed his men behind a rail fence running from the hill to the Mystic River bank and had them reinforce the rails with straw to fool the British. He also instructed the men to pile boulders along the exposed beach to create a makeshift wall. Then Stark stepped in front of the defenses, marked a spot about eighty paces away, and ordered his men not to fire until the redcoats reached that point.


Facing the Welch Fusiliers

The sound of the advancing elite Welch Fusiliers at the front of the British army caused men to check their flints as they waited patiently for Stark's command to "aim at their waistbands!" A horrific volley killed ninety fusiliers, causing the rest to panic and flee. The next wave fared no better, as a second volley blasted them. The final British assault was also repelled, ending the attack on the American flank. 
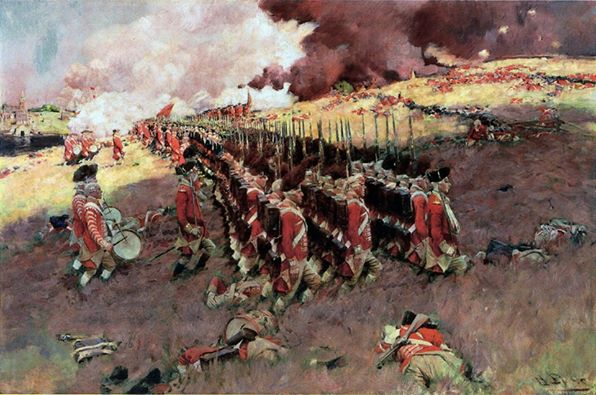

Bunker Hill: synonymous with Pyrrhic  victory


Similar results occurred on Bunker Hill itself until a lack of powder forced an American withdrawal, which Starks's men covered with disciplined musket fire. The British took the hill but with the devastating loss of officers and men. Over 1,000 officers and other ranks were killed or wounded. And so, typical of 18th-century warfare, many wounded would eventually succumb. 

Passed Over

Sadly, many promotions and appointments, especially early in the war, were driven by politics. When the post-Bunker Hill round of promotions occurred, the Continental Congress passed over Colonel John Stark in favor of less accomplished officers. This would anger Stark and fuel his resentment toward authority.

Continental Line

After the battle, Colonel Stark's command was incorporated into the Continental Army as the 5th New Hampshire Line. The unit distinguished itself while serving with General George Washington's army during the New York and New Jersey campaigns. Stark's men fought fiercely against the enemy in several battles, including Trenton, Assunpink Creek (2nd Trenton), and Princeton. 


Taking Trenton


At Trenton, Washington recognized his bravery and leadership skills in battle, entrusting him with command of the crucial right flank of Nathanael Greene's advance guard. 


Nathanael Greene


In the case of Assenpink Creek, he famously led a determined and gritty "forward defense" that stalled the British advance on the main army. Stark's actions at Assenpiunk Creek are vividly portrayed in my novel, The Winter Spy. 


Stark's defense at Assenpink Creek


But the headstrong and quick to take offense, Stark took issue when the Continental Congress promoted Enoch Poor to brigadier general ahead of him. In March 1777, he resigned from the army in a huff, refusing to obey either man or Congress. But unlike that other famously wronged general, Benedict Arnold, Stark's resentment never turned to treason, only a desire to prove himself.

Stubborn Patriot

While Stark now simmered at his New Hampshire farm, a new threat appeared in the north: a large British invasion force led by Major General John Burgoyne. Conditions in the north were so dire in the summer of 1777 that the New Hampshire authorities urged him to return to active duty in August. He agreed—on the condition that he commanded independently and was not under anyone's control. Then, rallying nearly 2,000 militia, he took the field. However, true to his independent spirit (and stubbornness), he refused a command from the local leader, General Benjamin Lincoln, and kept his men on the east bank of the Hudson River, separate from the main army in New York. 


General Burgoyne

Glory at Bennington

Burgoyne's army was moving south, but his supply lines soon became stretched thin. Hearing about an American supply depot near Bennington, he sent a large force of Germans under the experienced Lieutenant Colonel Friedrich Baum east toward what is now Vermont. When Stark learned of the move, he quickly marched to stop the advance. When Seth Warner's 600 men joined him, the combined forces attacked Baum near Bennington. 


Stark's militia would join with Seth Warner's


Before the main body commenced its attack, Stark stood before his men as he did at Bunker Hill and exhorted them, "There are the red coats, and they are ours or this night Molly Stark sleeps a widow."


Stark leading the attack


The ensuing battle was decisive. The American muskets wore down the exhausted Germans, and soon Stark's men launched an attack, killing 200 and capturing 700 of the Germans. Baum was among those killed. The victorious Americans only suffered 100 casualties but gained a significant psychological and material victory. John Stark's decisive action at Bennington is an exciting part of my upcoming novel in the Yankee Doodle Spies series, The North Spy.

Saratoga Sunset

In September, news of the victory rallied more Americans to the cause – men desperately needed as Burgoyne's final push to Albany clashed with General Horatio Gates's army south of Saratoga, New York. After a second encounter in October, Burgoyne retreated around Saratoga as he debated whether to risk another attack, hold his ground, or retreat along his supply line for the winter. When he finally decided to withdraw, Colonel John Stark had already taken that option away. The Granite General's troops swarmed the woods north of the British forces and cut them off from the safety of Fort Ticonderoga. Burgoyne was forced to surrender, marking a turning point in the struggle.
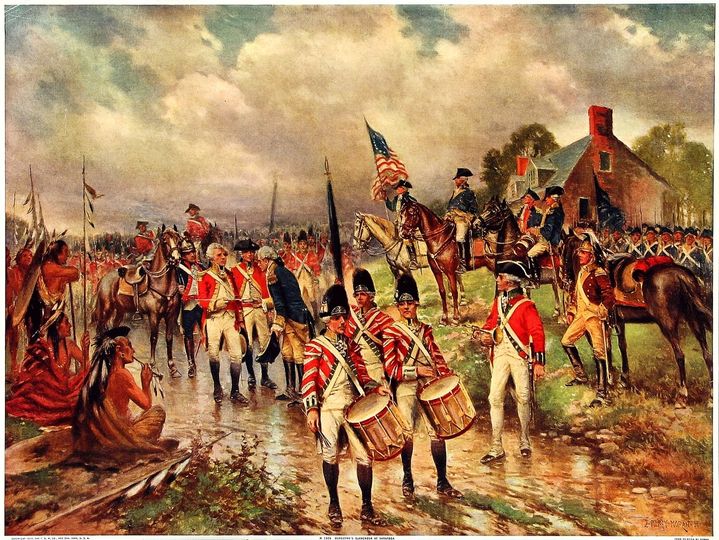

British troops in captivity


Getting His Due

In recognition of his distinguished leadership in the campaign that defeated the threat from Canada, Congress finally promoted Colonel John Stark to brigadier general. Congress later awarded him command of the Northern Department, where he twice assisted General John Sullivan during the Rhode Island campaign of 1778. Ironically, Sullivan was a general promoted over Stark earlier in the war. 


Brigadier General Stark

Brigadier General Stark last distinguished himself in combat in June 1780 against General Wilhelm von Knyphausen's Hessians at Springfield, New Jersey. He commanded two New Hampshire regiments that helped stop one of the advancing enemy columns. As a result, Knyphausen retreated, leaving several hundred casualties. This American victory was the last major battle in the north. The British remained holed up in New York City, content to leave major maneuvers to Lord Cornwallis's southern army.


Battle of Springfield


Although not part of major operations during this period, Stark contributed to the most significant espionage case of the war when he was called to serve on the board of generals for the court-martial of British spy Major John Andre. Andre had gone behind American lines in civilian clothes to meet the traitor Benedict Arnold. While Arnold escaped, Andre was captured while trying to return to British lines. Though Andre was a sympathetic figure, he was nevertheless rightly convicted and received the punishment assigned to spies: death by hanging.


Major John Andre


Stark finally left the army in 1783 with the rank of major general. Since George Washington was a lieutenant general (the highest position in the army at the time), Stark had reached the top level of serving Continental officers. 


Major General Stark


Granite State Citizen

Unlike many of his peers, John Stark did not use his wartime patriotism as a platform for political or economic gain. In 1809, the state of Vermont asked him to travel to Bennington to speak on the 32nd anniversary of the battle. However, Stark was too debilitated from rheumatism to make the trip. Instead, he wrote an eloquent letter praising those who served and everyone who fought, civilian or military, for independence. The old general issued a stern (or perhaps, stark) warning to always stay vigilant in the cause of liberty. The stoic general concluded his letter in a way only he could, injecting some of his fighting spirit with this warning: "Live free or die—Death is not the worst of evils." 


Stark's Monument at Bennington


Although it should, John Stark's name does not come to mind for most when thinking of Revolutionary War heroes, even in his home state. Interestingly, New Hampshire and Vermont have numerous places named after Molly Paige Stark, while John has only a few monuments. Stark's passionate use of Molly's name before Bennington made her more celebrated than him.

Molly Stark statue


John Stark died, the longest-living Continental Army general of the war, in Manchester, New Hampshire, on May 8, 1822. John Stark was more than a tough fighter—he struck the enemy hard whenever and wherever he could. He lived a life that reflects ideals cherished by all Americans: independence, rugged individualism, and defiance against unjust authority. These ideals remain the Granite General's enduring legacy. 


Stark's grave in Manchester


Saturday, June 30, 2018

The Spy of Massachusetts


In my last blog post, I discussed the origin of the term "Spy" and hinted at its use as a naming rubric for 18th-century newspapers. Now, a deeper dive into the subject of newspapers of the American Revolution.

A Literate Frontier

By the mid-1760s, there were 24 weekly newspapers in the 12 colonies, and satirical attacks on the government became common. Weekly newspapers in major cities and towns were strong symbols of patriotism, although a few Loyalist papers still existed.


Twelve of the British colonies had 24 newspapers 


Spy as a Newspaper

So, we can see that using the name “Spy” for a newspaper matches the origin of the word and its broader use. A newspaper’s staff and contributors observe, question, watch, and follow closely. At least, that is the hope of the public, who rely on their objectivity and fairness. As American society became more literate, the influence of the press increased.

Turbulent Times


The turbulent years between 1775 and 1783 were a time of great trial and disturbance for newspapers. Interruption, suppression, and lack of support significantly hindered their growth. Although there were forty-three newspapers in the United States when the Treaty of Paris was signed in 1783, compared with thirty-seven at the time of the Battle of Lexington in 1775, only about a dozen published regularly during that period. Curiously, not one newspaper in the larger coastal cities—Boston, New York, and Philadelphia—published uninterrupted throughout the war.


Voices of Rebellion

Obstacles


The nature of the rebellion contributed to some of these issues. When the colonial forces were in control, Loyalist papers were suppressed. Conversely, during the British occupation, patriot papers were either dispersed, discontinued, or temporarily converted into loyalist publications until the patriots regained control. As a result, some newspapers from coastal cities moved inland to continue publishing. War-related challenges led to logistical problems, including shortages of paper, ink, and other essential materials. This led to the production of poor-quality papers or the skipping of issues to conserve resources.


Papers often ran political cartoons and caricatures
that bordered on the absurd 


The Massachusetts Spy


Let’s examine the paper that exemplifies the kind of “Spy” we are discussing. Isaiah Thomas's Massachusetts Spy, published in Boston and Worcester, was often close to being shut down from its founding in 1770 through 1776 and during the American Revolution. Between 1771 and 73, the Spy featured writings from several anonymous political commentators who called themselves "Centinel," "Mucius Scaevola," and "Leonidas." They shared similar views on issues, kept patriot concerns on the front page, and responded to attacks from pro-government papers. Rhetorical combat was a patriot strategy that explained current issues and fostered patriotism without outright rebellion. The columnists addressed the colonists as an independent people, linked to Britain only through a voluntary legal compact. The Spy soon expanded its radicalism to a logical conclusion. Later, when articles from the Spy were reprinted in other papers, the entire country was prepared for Tom Paine's influential patriotic statement: Common Sense in 1776.


A critical voice in its heyday


Who was Isaiah Thomas?


We are not talking about a legendary NBA player but about a legendary newspaperman. Our Isaiah Thomas was born in Boston, Massachusetts, and apprenticed in July 1756 to Zechariah Fowle, a Boston printer, with whom he formed a partnership in 1770. This led to the publication of the Massachusetts Spy. The partnership dissolved after a few months, but Thomas continued publishing alone. He had a motto for his paper: “Open to all parties, but influenced by none.” Sort of the “Fair & Balanced” of its day. The Spy initially published three times a week, but under Thomas’s sole ownership, it became a semi-weekly, and then, in 1771, a weekly. The Spy championed the Whig cause early on, which led to the British government's attempt to suppress it. Massachusetts’s last Royal governor, Thomas Hutchinson, ordered the attorney general to prosecute Thomas, but the grand jury failed to find cause for an indictment.


Isaiah Thomas holds an essential place in America's
publishing pantheon

More Flash than Bang?


The overall spirit of the era generated many mottoes, editorials, letters, and poems. At the beginning of the struggle, both editorials and communications called for united resistance to oppression, praised patriotism, and condemned tyranny. As time passed, these patriotic appeals grew stronger and shaped public opinion. Later, the idea of independence took shape, and debates about government were held. Sadly (or perhaps fortunately), enthusiasm for the cause often overshadowed journalistic standards, leading to exaggerated or even false reports.


A Struggle of Ideas

Despite their flaws, the newspapers of the Revolution were a powerful force in uniting people's feelings, sparking a shared sense of purpose, interest, and vision among the separate colonies, and fostering the determination to see the war through to a successful conclusion. They were often more focused than the people themselves and carried a significant share of the responsibility for inspiring and sustaining the often discouraged and indifferent public spirit. In this way, they played a vital role in guiding the thirteen struggling colonies through a long and seemingly impossible fight that resulted in an unlikely victory.


The struggle of ideas led to and buttressed the
struggle for independence


Sunday, April 15, 2018

The Shot Heard Round the World

This is the anniversary week of the battles of Lexington and Concord – the famous “shot heard round the world” did not occur in a vacuum. Over a decade of political strife and miscalculation led to Englishmen firing upon Englishmen, a concept that would have been considered absurd just months before the event. So I am going to provide a short overview of those events that took a political crisis to insurgency and finally open rebellion.

Colonial Crisis


Almost after the last whiff of gunpowder dispersed into the blue skies over North America at the end of the French & Indian war in 1763, a crack began to develop in Britain’s newly won empire. The problems involved the management of the new empire and the governance of the English settled colonies, native Indians, and the French-speaking Quebec and the economics of the empire.  These cracks were subtle at first but over time, they seemed to split of their own weight. The war had plunged the British government deep into debt, and the British Parliament sought to exploit the colonies for quick funds. They enacted a series of coercive measures to pull revenue from the colonies.

The French and Indian War sowed the seeds of later conflict
between Britain and her colonies


The Stamp Act


The Stamp Act of 1765 was one of the first initial measures forced upon the American colonists, instated to help pay for troops stationed in North America after the British victory. A tax on paper – it was not well received and more and more American colonists became politically active.


The Townshend Acts


Charles Townshend


Then in 1767, Parliament passed a series of acts called the Townshend Acts, named after Charles
Townshend, the Chancellor of the Exchequer who devised the program. These included: the Revenue Act of 1767, the Indemnity Act, the Commissioners of Customs Act, the Vice-Admiralty Court Act, and the New York Restraining Act. This stirred up more agitation across the colonies but especially in New England where the acts met immediate resistance.


The King Street Incident


The political unrest caused by the Townshend Acts would lead to the event known to the British as the King Street incident. But you know it as The Boston Massacre. Colonial agitators accosted British soldiers and threatened them with violence. Their reaction led to the shooting of that name. By now the colonists in opposition to the Crown began organizing. The British met the colonial reaction with one more action. The Tea Act was one of the final coercive measures passed by Parliament and became the last straw, making it the final unifying factor that brought the colonies from political agitation to an insurgent-like movement that would lead to open rebellion. The Parliament's insistence on the right to tax the colonies, in the end, became too much. The Tea Act was a lame attempt to convince the Americans to buy British tea and recognize Britain's right of taxation.


Boston Massacre provided rebels propaganda 


The Party


The colonies refused to accept this policy, and instead, the Sons of Liberty, one of many local insurgent groups, staged what became known as the Boston Tea Party. The Loyalist governor, Thomas Hutchinson, refused to let ships leave without the colonists paying the duty. The radicals were stirred to action. The Sons of Liberty and their supporters disguised themselves as Mohawk warriors and clambered aboard the remaining British vessels in port tied at Griffin’s Wharf. They sent 342 chests of British tea to the bottom of the harbor.


Boston Tea Party


The Reaction

The British responded to the party by instating the Intolerable Acts, which the colonies refused to submit to. The British government now tightened its grip on Massachusetts. The new royally appointed governor, General Thomas Gage, was given expanded powers, and several thousand more troops to garrison Boston and cow the colonists with a show of force. Along with these acts, Parliament closed the Boston harbor, and sent 4,000 British troops to Boston, to patrol the "rebellious areas." Parliament believed that these acts were perfectly legitimate, that the colonies needed to pay for the maintenance of the British Empire. The colonies thought differently. And a drumbeat of actions began a small but growing political rift that would lead to an insurgency of sorts.


Boston Port Bill closed the harbor
impacting New England's economy


Birth of Rebellion


Lieut Col Francis Smith
led the ill-fated column
But the colonists reacted with more action, and by 1775 political crisis morphed to open insurgency careening towards rebellion. The Massachusetts colonial assembly directed the townships to ready their militias, which had already been preparing for what many foresaw as the coming conflict. The British had many sympathetic Loyalists who kept them apprised of the growing resistance. In April 1775, Gage received orders to disarm the rebels. Gage ordered Lieutenant Colonel Francis Smith to gather 700 British Army soldiers and march to Concord, where the rebels were reportedly storing mass quantities of arms and ammunition. Their orders were to find the stash and destroy it. He also had orders to arrest certain rebel leaders such as Sam Adams and John Hancock. Smith’s column was drawn from 11 of Gage's 13 occupying infantry regiments. Major John Pitcairn commanded ten elite light infantry companies, and Lieutenant Colonel Benjamin Bernard commanded 11 grenadier companies. Quite a shock force by any measure.


General Thomas Gage faced a difficult situation


An Intelligence War


But the patriots, as the rebels deemed themselves, had an intelligence network. Some believe Gage’s American wife, Margaret Kemble Gage, was a rebel spy. See my blog post, “The Lady was a Spy?” Regardless of the source, the rebels had received word of the British orders. On 8 April, Paul Revere rode to Concord and notified local militias in the area to be on the alert for the British army forces. On 18 April, Revere received word of British “regulars” making their way to Lexington and Concord. Having already warned the militia in Concord, which had secured the weapons supply, Revere and William Dawes rode quickly to Lexington to warn the townspeople of the expected British onslaught.


Margaret Kemble Gage: Spy?

Shot Heard Round the World


This began a frantic race to Lexington during the night: The British pressing to maintain surprise, the patriots to gather enough forces to challenge them.  The celebrated first clash took place at Lexington Green, the town square, dawn on the morning of 19 April. Militia Captain John Parker, a veteran of the Seven Years' War, led some 80 Lexington militiamen, known as minutemen. The British had 700. Years later, one of the participants recalled Parker’s alleged words before the skirmish: “Stand your ground; don’t fire unless fired upon, but if they mean to have a war, let it begin here.”


Race to Concord


A British officer demanded that the militia disarm and disperse, and in the ensuing confusion, muskets were fired. To this day, there exists considerable uncertainty over whether the militiamen or the British soldiers fired first. Regardless, the British soldiers rushed forward with their bayonets. A skirmish ensued, during which eight militiamen were killed and only one British soldier wounded. Resistance melted away at Lexington, and the British moved on to Concord, where militia from Concord and nearby Lincoln awaited anxiously. The British found and destroyed some rebel weapons caches, but most of the colonists’ military supplies were hidden or destroyed.


The shot heard round the world on Lexington Green


At the approach of the huge British column, the Concord militia retreated to a ridge overlooking the town and militia colonel James Barrett withdrew from the town of Concord and led the men across the North Bridge to a hill about a mile north of town, where they could continue to watch the troop movements of the British and the activities in the center of town. The militia faced off against the regulars at the North Bridge.

Minutemen take on British at North Bridge


When a British covering party of around 100 regulars moved to secure the North Bridge, they were attacked by some 400 American patriots.  The regulars were both outnumbered and outmaneuvered. Confused orders from their commander and the superior numbers of the rebels broke their morale. In a confused retreat, they abandoned their wounded in search of the safety of the approaching grenadier companies coming from Concord. Despite the setback at the North Bridge, the regulars continued to search for and destroy colonial military supplies in the town while the rebels watched anxiously. They paused for lunch, assembled for a march, and left Concord in the afternoon.


Militias swarmed the returning British column inflicting maximum casualties


But the deliberate actions of the British, aimed at displaying British superiority, had an unintended consequence. It gave the colonial militiamen from outlying towns and villages additional time to reach the road back to Boston. The call went out and more and more companies of militias swarmed along the British column as they marched back to Boston. It was all the officers could do to avoid panic with revenge-minded rebels continually firing on them from behind roadside houses, barns, trees, and stone walls. Some estimates give the rebel strength at 2,000 by the time the British column returned to Boston. The bill for the day’s actions: British 273, Americans 95.

Aftermath


When the British returned to garrison, the militiamen began to lay siege to Boston.  The call went out to the other colonies and soon they were joined by militias from Connecticut, New Hampshire, and Rhode Island. These colonial forces would be constituted as the Continental Army by the Second Continental Congress. The Battles of Lexington and Concord turned the decade-long crack between the colonists and the mother country into a chasm Britain could never breach. It also widened the split between the patriots and Loyalist colonists, who soon would wage their own savage war within a war. But the immediate result was impressive: it roused 16,000 New Englanders to the join forces around Boston.  Less than a year later, the British army of occupation would withdraw to Canada to prepare for a long war.


The British occupation of Boston


The American Revolutionary War had begun. But it would take another year for that to morph into a war for independence.

Saturday, September 16, 2017

Blackstock

A Savage War of Posts


Gen Thomas Sumter
The William Blackstock farm became the site of one of those "small" but violent clashes that shaped the complex mosaic of the American Revolution in the South. The farm, which includes several tobacco barns, sits just off the Tyger River on the western edge of Union County, South Carolina. This remote farm provided the setting for one of American General Thomas Sumter's most significant battles. 

In November 1780, Georgia militia under Elijah Clark and John Twiggs reinforced Sumter, whose forces threatened Loyalist outposts north of the famed bastion at Ninety-Six. Sensing that a threat to Ninety-Six could make it impossible to hold, the British commander in the South, Lord Cornwallis, ordered famed cavalry leader Banastre Tarleton to break off contact with Francis (Swamp Fox) Marion's militia along the Pee Dee River. 

Tarleton hurried to his new mission, hoping to trap Sumter's forces between himself and the British at Ninety-Six. Luckily, a British deserter warned Sumter, who quickly retreated to avoid the trap. Not to be outdone, the aggressive Tarleton chased after the rebel force, determined to catch them before they could escape. To do this, he led his cavalry, leaving infantry and artillery to follow behind.


A Defense Well Prepared


Elijah Clarke
Sumter's force reached the Tyger River at dusk on November 20th. The clever Sumter realized he had "good ground" and decided to establish defensive positions to frustrate his pursuers with a strong defense of the farm. The famous "Gamecock" deployed his 1,000 men in defensive positions. 

They didn't have to wait long before Tarleton's Legion—190 dragoons and 80 mounted infantry of the British 63rd Regiment—was spotted moving toward them. Recognizing that the rest of Tarleton's force was far behind, Sumter chose to surprise the leading troops with an attack. He left his center to defend the high ground, taking cover behind five log cabins and a rail fence. 

Elijah Clark was sent with his 80 Georgians around Tarleton's right flank to block the advancing British forces. Meanwhile, Sumter led the main charge with 400 militia against 80 dismounted 63rd Regiment soldiers who had positioned themselves to the right of the British advance.


Sketch of the battlefield


A Back and Forth Struggle


Sumter's plans disintegrated when the British 63rd repelled his militia, who retreated back through the houses anchoring the center. Not to be discouraged, Sumter sent a force of mounted infantry under Colonel Lacey with orders to strike the British dragoons on the left. Lacey's men surprised the dragoons, who were admiring the work of the 63rd. Lacey's first volley caused 20 casualties among the troopers. However, they quickly recovered and drove off Lacey's men. 

Eager to defeat the rebels, the 80 men of the 63rd attacked the center. A bayonet charge led by Major John Money attempted to push back the rebels, but the 63rd advanced too close to the farm buildings and came under fire from Colonel Henry Hampton's men within, who, as usual, aimed "at the epaulets and stripes." Money and two of his lieutenants were killed, and, according to an officer of Fraser's Highlanders, a third of the privates as well. 

Meanwhile, other partisans maneuvered around their right flank to attack Tarleton's dragoons, who were in their saddles but only watching the action. Now that Hampton's South Carolina riflemen and some of the Georgia sharpshooters held the line to check the British, Sumter's men began to rally around them. The British infantry was trapped under the muskets and rifles of an enraged patriot force. 


Banastre Tarleton


Seeing their plight, Tarleton led a desperate charge at the American center. The reckless uphill cavalry charge against riflemen firing from cover was not successful. One report described so many dragoons being knocked from their horses that the road to the ford was blocked by their bodies, fallen chargers, the wounded, still targets, struggling to get back over their stricken comrades and kicking, screaming horses. Despite this chaos, the British forces retreated in good order.


Tarleton's cavalry attack was repulsed by intense American fire


Change of Command


John Twiggs
Not without his own bravado, Sumter rode to the center of his line as the British dragoons were driven back. As they retreated, members of the 63rd fired a volley at him and his officers. Sumter was severely wounded, hit in the arm and the back, and had to give up command to John Twiggs. 

Knowing he wouldn’t have any more success that day, Tarleton pulled back and waited for reinforcements, hoping to launch another attack the next day. Fearing that troops from Ninety-Six might join with Tarleton to overpower them, the Americans retreated. To fool the British scouts, Twiggs left campfires burning and withdrew under cover of night. 

Tarleton claimed victory on the battlefield the next day. But he probably felt the frustration as he had to bury the dead from both sides. The cost was uneven: British casualties included 92 killed and between 75-100 wounded. American casualties were 3 killed, 4 wounded, and 50 captured.


View of American defenses


After the Battle


The engagement at Blackstock Farm is little known and nearly forgotten for many years. Tarleton boasted of his victory and the dispatching of the hated Sumter. Yet his regulars failed to drive the rebel militia from the field and suffered an unacceptable loss ratio. Moreover, Sumter would return to action in a few months. Meanwhile, his wound opened the door for General George Washington to appoint the New England fighting Quaker Nathanael Greene as the overall commander of the Southern Department.


Nathanael Greene


The Battlefield Today


The Blackstock Plantation, formerly a series of tobacco barns, lies in a hilly, wooded area. In the eighteenth century, much of the land of the battlefield was cleared but has since become overgrown with small pines and brush. No above-ground evidence remains of Blackstock’s barn or house, which were located near the area marked by the historical marker designating the battle site. There are also no modern buildings in the battlefield area. The site covers 54 acres and features walking trails just south of the Tyger River.